The Basics of Wheel Tightening
Ever found yourself on the side of the road with a flat tire and a trunk full of tools, but not quite sure on the right way to get that spare on safely? You’re not alone. Many of us have been there, turning a wrench and hoping we’re doing it right. Tightening your car’s wheels properly isn’t just a good skill to have; it’s crucial for your safety and can save you from a lot of headaches down the road.
Knowing how to change a tire is great, but understanding the correct sequence to tighten those lug nuts is where the rubber meets the road—literally. It ensures your wheel is evenly mounted and avoids unnecessary strain on your car’s wheel studs or brake rotors. Whether you’re dealing with an unexpected flat or just doing some routine maintenance, getting this right can keep your ride smooth and your mind at ease.
So, if you’re ready to boost your car-maintenance chops and ensure you never get that sinking feeling halfway through a tire change, stick around. We’re going to break it down for you, ensuring you can handle this task like a pro next time it pops up. Let’s get those wheels rolling safely with a proper tighten-up!

Understanding the Wheel Tightening Sequence
Why is there a specific sequence for tightening wheel lug nuts, you might ask? Well, it’s all about balance. The sequence ensures that the wheel is evenly and securely attached to the axle, preventing any wobbling or warping of the wheel or brake components. Let’s dive into how this sequence works and why it’s crucial for maintaining your car’s performance and safety.
The Star Pattern: Ensuring Even Pressure
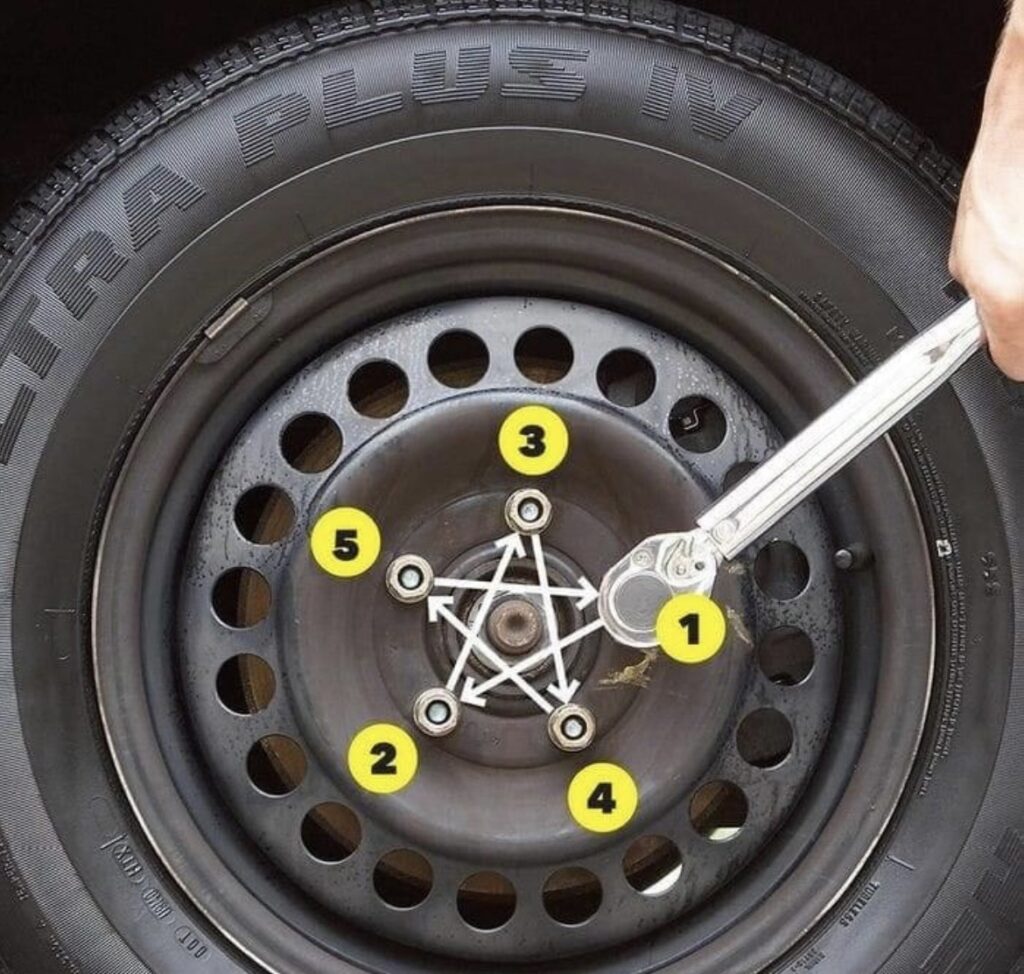
The most recommended method for tightening car wheels is the star or crisscross pattern. This technique involves tightening opposite lug nuts sequentially rather than going around in a circle. This pattern ensures that the wheel presses evenly against the brake rotor, which is essential for:
- Preventing Vibration: Even tightening reduces the risk of vibrations while you drive, which can lead to uneven tire wear and potential safety issues.
- Avoiding Damage: An unevenly mounted wheel can warp the brake rotor over time, leading to expensive repairs.
Step-by-Step Guide to the Star Pattern
- Start at the Top: Begin with the lug nut at the top of the wheel.
- Move Opposite: Tighten the lug nut directly opposite the one you just tightened.
- Continue in a Star Formation: Move in a crisscross pattern across the wheel, always tightening the lug nut opposite the previous one.
For visual learners, check out our guide on “Gear Up: Decoding the Drive – FWD, RWD, 4×4, and AWD Explained,” which includes helpful diagrams on wheel maintenance.

Tools for the Job
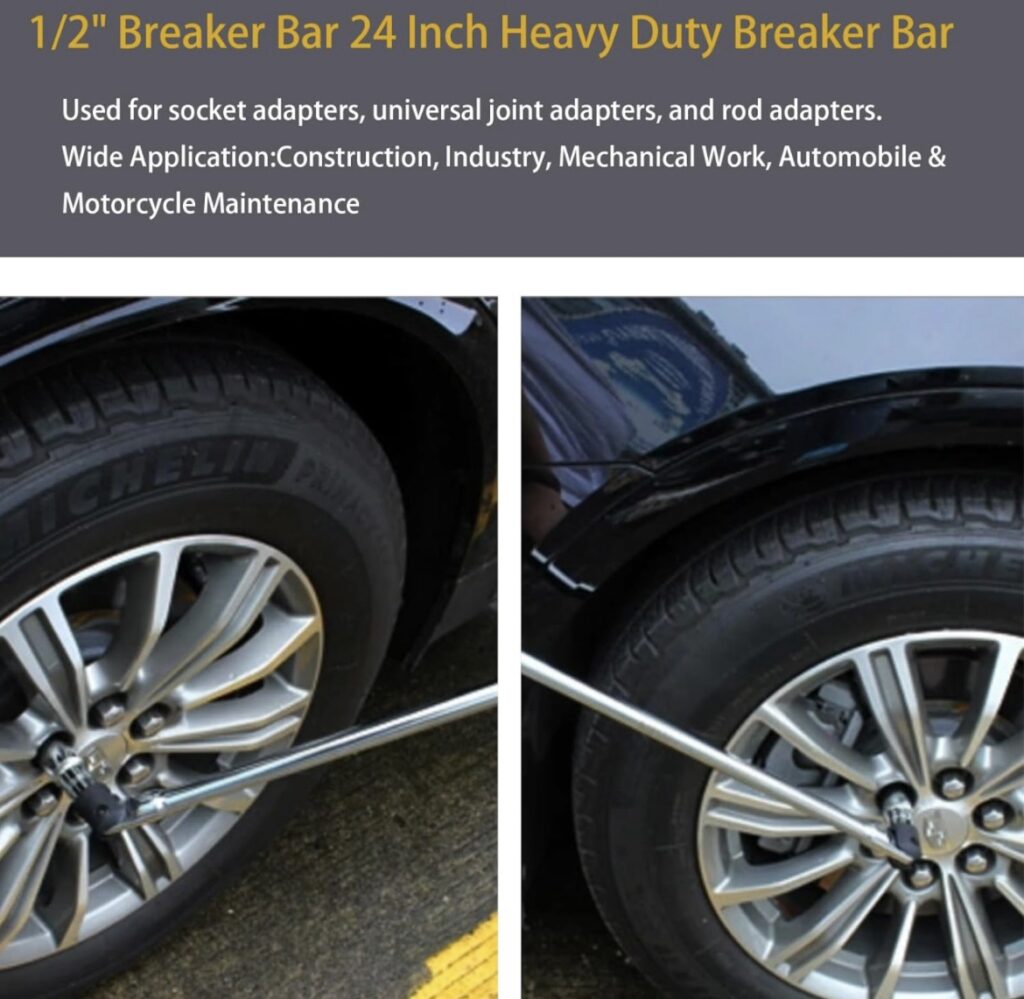
A reliable tool like the Maxanda Breaker Bar 24” Heavy Duty 1/2 Breaker Bar is essential for breaking loose tight lug nuts and ensuring you can apply sufficient torque when tightening them back on. This tool’s extended handle and durable construction make it perfect for applying the extra leverage needed, especially if you’re dealing with lug nuts that haven’t moved in a while.
Using the right tools not only makes the job easier but also ensures that you’re applying the correct amount of force without damaging your vehicle’s components. A quality breaker bar like the Maxanda Breaker Bar is a must-have in your automotive toolkit, making tire changes smoother and less of a strain.
In the next section, we’ll talk about the common mistakes to avoid when tightening your wheels and how to ensure you’re doing it right every time. Stay tuned for more tips that will keep your vehicle running safely and efficiently.
Tools You’ll Need for the Job
Changing a tire and tightening the wheel correctly requires more than just elbow grease. It’s about having the right tools for the job, which ensure you can perform the task efficiently and safely. Let’s look at the essential tools every man should have in his car maintenance kit, especially when dealing with tires.
Essential Tools for Changing and Tightening Wheels
- Lug Wrench: This is used to loosen and tighten the lug nuts. Most cars come with a basic lug wrench, but you might consider upgrading to a more durable or user-friendly model.
- Torque Wrench: After using a lug wrench, a torque wrench is crucial for ensuring that the lug nuts are tightened to the manufacturer’s specified torque. This prevents over-tightening or uneven tightening, which can damage wheels and brakes.
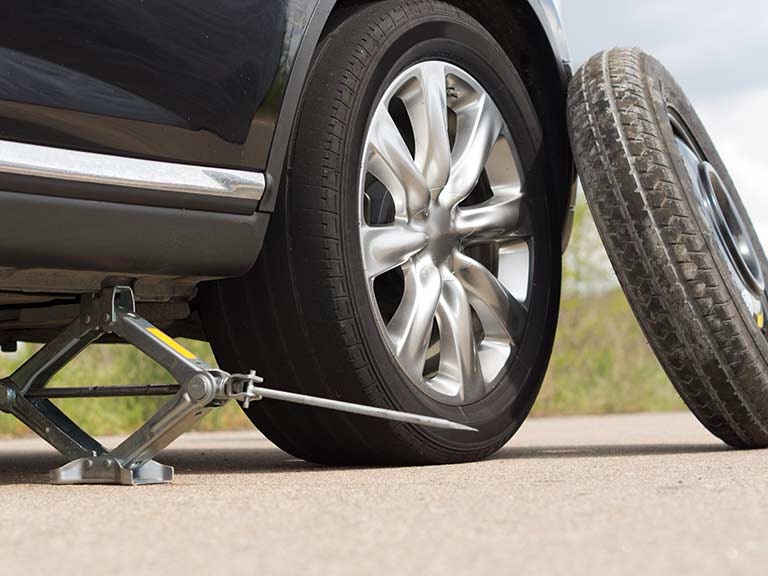
- Jack: Necessary for lifting the vehicle off the ground safely so you can remove and replace the tire.
- Wheel Chocks: Used to secure the vehicle and prevent it from rolling while you’re working on it.
- Maxanda Breaker Bar 24” Heavy Duty 1/2 Breaker Bar: Ideal for breaking loose tight lug nuts with minimal effort, this breaker bar ensures you’re not straining yourself or damaging the lug nuts.
Why the Right Tools Matter
Using the correct tools, like the Maxanda Breaker Bar, not only makes the job easier but also helps protect your vehicle from damage. Over-tightening lug nuts with an inadequate tool can warp brake rotors, while under-tightening can lead to a wheel coming loose while driving, which is extremely dangerous. The right tools ensure that you can apply the exact amount of force needed, in the right way.

Tips for Using Your Tools Effectively
- Break Loose and Tighten with Ease: Start with the Maxanda Breaker Bar to break the lug nuts loose. Once you’ve replaced the tire and need to tighten the lug nuts, use the same bar for the initial tightening, then finish with a torque wrench to ensure precision.
- Check Torque Settings: Always refer to your vehicle’s owner manual for the correct torque settings. This ensures you are applying the right amount of force to the lug nuts.
- Regular Tool Maintenance: Keep your tools clean and stored properly. Regular maintenance of your tools will extend their life and ensure they are ready when you need them.
Equipped with the right tools and knowledge, you’re now set to handle one of the most common roadside issues: a flat tire. Next, we’ll delve into common mistakes to avoid during the wheel tightening process, ensuring your safety and keeping your vehicle in top condition.
Common Mistakes to Avoid When Tightening Your Wheels
Tightening your car’s wheels seems straightforward enough, but common mistakes can lead to serious issues down the road. Understanding what to avoid is just as crucial as knowing the correct steps. Here are some pitfalls every man should be aware of to ensure that a simple tire change doesn’t turn into an expensive or dangerous situation.
Over-Tightening the Lug Nuts
One of the most frequent errors is over-tightening the lug nuts. This might seem like a good way to ensure the wheel won’t come loose, but it can actually cause more harm than good, such as:
- Warped Brake Rotors: Applying too much torque can warp the brake rotors, leading to uneven brake wear and a wobbly ride.
- Stripped Threads: Over-tightening can strip the threads on the lug studs, making them weaker and prone to breaking.
Using a torque wrench for the final tightening, set to the manufacturer’s recommended settings, ensures that you apply just the right amount of torque. It’s a safeguard against the temptation to over-tighten with a standard wrench or breaker bar, such as the Maxanda Breaker Bar 24” Heavy Duty 1/2 Breaker Bar.

Ignoring the Correct Sequence
Skipping the star or crisscross pattern might save a few seconds, but this mistake can lead to:
- Uneven Tire Wear: Tightening lug nuts out of sequence can cause the wheel to sit unevenly, leading to irregular tire wear.
- Safety Risks: An improperly mounted wheel might come loose while driving, posing a serious safety risk.
Always follow the star pattern for tightening, as it ensures the wheel is evenly and securely attached to the axle hub.
Not Checking Lug Nuts After Driving
Many drivers forget to re-check their lug nuts after the first drive following a tire change. It’s crucial to:
- Re-Torque Lug Nuts: After you’ve driven 50 to 100 miles, it’s wise to check and re-torque the lug nuts to ensure they haven’t loosened. This is especially important after a tire change, as lug nuts might settle a bit after the wheel has been loaded and driven on.
Not Using Quality Tools
Compromising on tool quality can lead to compromised safety. Reliable, sturdy tools like the Maxanda Breaker Bar not only make the job easier but also ensure that it’s done correctly. Inferior tools can slip, break, or fail to provide the leverage needed, all of which can lead to improper installation or personal injury.
Avoiding these common mistakes can save you from roadside troubles and potential vehicle damage. Up next, we’ll share some advanced tips and tricks that can help you refine your technique and ensure your vehicle’s wheels are always secure and ready to roll.

Advanced Tips and Tricks for Wheel Tightening
Now that we’ve covered the basics and what to avoid, let’s dive into some advanced tips and tricks that can elevate your wheel tightening game. These suggestions will help ensure your vehicle remains safe and performs optimally, whether you’re an experienced DIY mechanic or a newcomer to car maintenance.
Use a Quality Breaker Bar for Initial Loosening and Final Tightening
Starting and finishing with a reliable tool like the Maxanda Breaker Bar 24” Heavy Duty 1/2 Breaker Bar can make a significant difference. Here’s why:
- Ease of Use: The extra leverage provided by a 24-inch handle makes it easier to break loose tight lug nuts and apply the initial torque needed without straining.
- Precision: For final tightening, use the breaker bar to snug the lug nuts against the wheel before applying the final torque setting with a torque wrench.
Always Double-Check with a Torque Wrench
Even if you feel confident after using the breaker bar, always double-check the torque with a torque wrench. This ensures that each lug nut is tightened to the manufacturer’s specifications, which is crucial for maintaining vehicle safety and wheel performance.
Keep a Torque Chart in Your Vehicle
Different vehicles require different torque settings. Keeping a torque chart in your glove compartment or on your phone can help you quickly reference the correct settings for your vehicle or others you might work on. This is especially useful if you often help friends or family with car maintenance.
Regularly Calibrate Your Torque Wrench
To ensure accuracy, your torque wrench should be calibrated regularly. This is often overlooked but is critical for maintaining the integrity of the tool and the safety of your vehicle. Consider having your torque wrench calibrated annually, or after it’s been used extensively.
Consider the Conditions
Be mindful of the conditions in which you are tightening your wheels. Factors such as temperature and humidity can affect metal expansion and contraction, potentially impacting how lug nuts hold. In extreme conditions, it might be wise to re-check the torque settings after the vehicle has acclimated to its environment.
Learn and Apply
No amount of reading can substitute for actual hands-on practice. Spend time familiarizing yourself with these tools and techniques:
- Practice changing a tire in your driveway or garage to feel more prepared before you find yourself needing to do it on the side of the road.
- Use the Maxanda Breaker Bar during these practice sessions to experience firsthand the difference it makes.
By incorporating these advanced tips into your routine, you not only enhance your skill set but also boost your confidence in handling one of the most common vehicle maintenance tasks. Safety, efficiency, and reliability are your goals, and with the right tools and knowledge, you’ll meet them every time. Stay tuned for our concluding thoughts on why mastering this skill is crucial for every car owner.

Mastering the Art of Wheel Tightening
Mastering the art of wheel tightening is more than just a maintenance skill—it’s an essential part of ensuring your safety and the longevity of your vehicle. Whether you’re a seasoned gearhead or a beginner just starting to handle your own car repairs, understanding and applying the correct wheel tightening sequence will save you time and money while preventing potential accidents.
Why This Skill Matters
Every driver should know how to properly tighten their car’s wheels. It’s not just about avoiding the inconvenience of a wheel coming loose; it’s about ensuring that your vehicle functions as it should, keeping you and your passengers safe on the road. Proper wheel tightening affects everything from vehicle handling and tire wear to fuel efficiency and brake performance.
Tools of the Trade
Remember, investing in quality tools like the Maxanda Breaker Bar 24” Heavy Duty 1/2 Breaker Bar isn’t just spending money; it’s investing in your safety. These tools make the process of changing and tightening wheels much easier and more accurate. By equipping yourself with the right tools and knowledge, you’re preparing yourself to handle common roadside issues effectively and safely.
Keep Learning and Practicing
Automotive care is an ongoing learning process. By continuously educating yourself and staying up-to-date with the best practices in car maintenance, you ensure that your skills remain sharp and your knowledge stays relevant. Websites like MenGuidingMen offer a wealth of information on various automotive topics, from wheel tightening to decoding different drive systems as seen in “Gear Up: Decoding the Drive – FWD, RWD, 4×4, and AWD Explained.”

In conclusion, taking the time to learn and master the proper wheel tightening sequence and investing in the appropriate tools is not just about doing car maintenance—it’s about taking proactive steps towards responsible vehicle ownership. Keep practicing, stay prepared, and drive safely knowing that your vehicle is well-maintained and ready for the road.
As an Amazon Associate we earn from qualifying purchases through some links in our articles.


